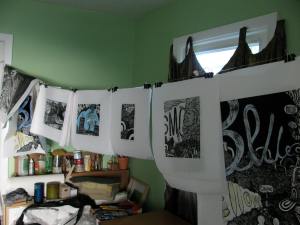
Previously on my blog I gave a glimpse into my home studio to show that a large space, which I do want to someday have, is not necessary to make prints. In fact, a real printmaking studio, though beneficial, can be circumvented with home ingenuity.
To see the previous blog post click here:
https://drewkail.wordpress.com/2011/10/18/a-look-into-my-studio/
Here is the finished print
 “Across Town”
Plate Size: 5 1/2″ x 3 1/4″
Paper Size: 7 9/16″ x 5 6/8″
I graduated from Portland State University last June, and upon graduation lost access to the great printmaking facilities on campus. I was a printmaking grad without a studio. I couldn’t afford a pay as you go printmaking facitlity and live in a small 750 square foot house with my wife and three cats. Not an ideal situation for putting a printing press. Since June I have mainly concentrated on showing my work, but have always been thinking about solutions to my space problem.
The blog post linked above was my first stab at one table printing. Many of the materials I incorportaed came from my own home or from my local creative reuse center called SCRAP. If you’ve read my blog before, you probably know how interested I am in using Rclaimed materials. From my home came old towels, a big bowl as a water bath and my printing inks/brayers which I purchased from Daniel Smith Art Supply. I printed an edition of 67 prints with a metal spoon. At the end of it, honestly, my hands hurt, but I had succeeded in printmaking within my tiny studio. Awesome.
A few days ago I was set to do it again with a new block. Initially, the linocut I was planning on printing was to be another black and white image. After it was carved I decided to up the ante and make the remaining block a reduction in order to derive a good registration system and improve the functionality of my workspace. This printing process is what I will be documenting beginning with this post. I do not know how many colors the finished print will be, or if it will be good at all, but I wanted to show a printmaker at work with limited space, without a press and on a budget.
If you live in the Portland area, you are lucky to have an organization like SCRAP which takes in loads of materials beneficial to printing at home which would otherwise be destined for the landfill. Check your local area for a like organization. The link for SCRAP is listed under Resources, Artists and Organizations. If you do not have one, no big deal, because this post is also about creating a home printmaking studio regardless of accessible space. You may even be able to derive your own ways with found materials that work way better than what I’m doing, and if so, please share. Throughout the post I will point out the origin of the materials I’ve used.
From the previous printing I kept my towels, the pieces of acrylic I found at SCRAP, the inks and brayers from Daniel Smith, and the painters tape. New additions to the process were utilizing the bath tub as a water bath, please make sure it is clean before soaking you paper, a registration board made from foam core (from SCRAP) and thumb tacks (found in a drawer, origin unknown). Oh… and I ditched the metal spoon for the handle side of a silkscreen squeegee. I also use a sheet of wax paper between the handle and the printing paper to reduce friction when printing. Silkscreen Squeegee found at SCRAP. Wax Paper, very inexpensive at supermarket.


I’m using the leftover scraps of paper from past tear downs. Those cast away strips of paper that too often seem useless. I collect those. Since many have slightly wonky sides and corners I’ll probably cut them down instead of tearing. So, I measured on the foam core the rough paper size and where I want the image to be. then I cut out the plate area where the lino will rest. At the edge of the paper outline I’ve drawn an excess margin and affixed three thumb tacks. I will poke the tacks through each piece of paper upon printing. During each successive colors printing the paper and tacks will be matched up by the original holes and hopefully create an accurate registration system. I’ve seen examples of this registration technique, but have never tried it myself.
****Important Note**** When soaking paper in your bathtub in a house with three cats, keep the door closed. I started with 30 pieces of paper and have lost five due to a cat becoming curious, falling in the tub and thrashing to get out. Lesson learned for both myself and Matisse. Since I haven’t done a reduction print in four years and have never implemented this registration technique, I imagine I will lose a few more prints along the way. My main goal is to learn more and improve for the next one.

In Process shots. I decided to start with a dark peach color.

I’m using the top of my homemade light exposure unit as an inking station to open up more table space.

Same old cardboard box as a cat proof drying rack.
A few notes from the first run. I used the spine of a hardback book to print a couple images as well. Really the key is stiff, even contact with limited friction. The wax paper works amazing.
Now to figure out what to carve next, and what color to choose for the second run.
Copyright © 2012 by Drew Kail


